

Like a breath of fresh air on a sunny spring day, refreshing an old wardrobe with new hardware and finish can breathe new life into your living space. But where do you start? How do you choose the right hardware and finish to transform your tired wardrobe into a stylish centerpiece? In this discussion, I will guide you through the process of revamping your wardrobe, from selecting the perfect hardware to applying a fresh coat of finish. So, if you’re ready to give your old wardrobe a stunning makeover, keep reading to discover the secrets of creating a stylish and rejuvenated space that will leave your guests in awe.
Benefits of Wardrobe Refresh
Refreshing my old wardrobe not only breathes new life into my style but also boosts my confidence and revitalizes my personal image. When it comes to wardrobe refresh, I always look for cost-effective options that can help me make the most of my budget. One of the benefits of refreshing my wardrobe is the opportunity to increase its storage capacity. By incorporating clever storage solutions, such as collapsible hangers, hanging organizers, and stackable bins, I can optimize the space in my closet and make room for more clothes and accessories.
Not only does increasing storage capacity allow me to expand my wardrobe, but it also helps me stay organized and efficient. With a well-organized closet, I can easily find what I need, saving time and eliminating the stress of searching through clutter. This newfound organization gives me a sense of tranquility and control, which reflects positively on my overall well-being.
Moreover, refreshing my wardrobe gives me the chance to reassess my personal style and experiment with new trends and fashion choices. It allows me to step out of my comfort zone and explore different looks, which ultimately boosts my confidence. When I feel good about what I’m wearing, it translates into how I carry myself and interact with others.
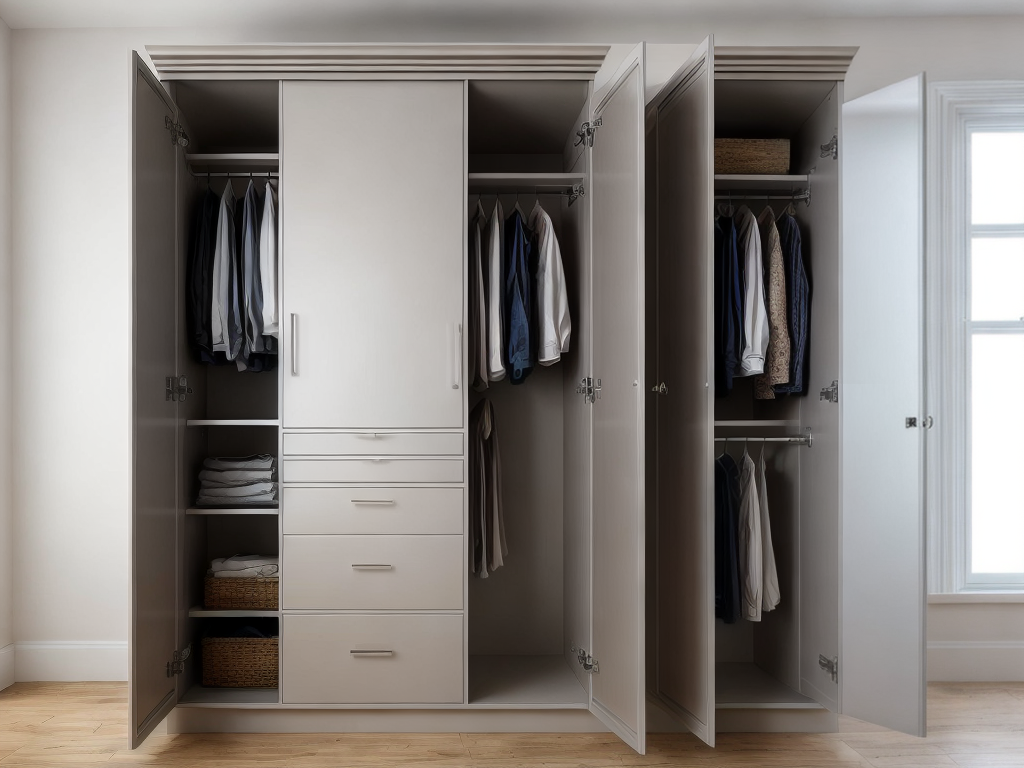
Choosing the Right Hardware
When updating my wardrobe, it is important to carefully consider and select the appropriate hardware to enhance the functionality and aesthetics of my closet. The right hardware can make a significant difference in upgrading style and enhancing functionality. Here are four key factors to consider when choosing the right hardware for your wardrobe:
-
Material: Opt for high-quality materials like brass or stainless steel. These materials are not only durable but also add a touch of sophistication to your closet.
-
Finish: Choose a finish that complements your wardrobe’s overall style. Whether it’s polished chrome for a modern look or antique bronze for a vintage vibe, the right finish can elevate the entire aesthetic of your closet.
-
Design: Consider the design of the hardware and how it will blend with your wardrobe. Sleek and minimalistic designs work well for contemporary styles, while ornate and intricate designs can enhance the elegance of more traditional wardrobes.
-
Functionality: Look for hardware that offers additional functionality. For example, opt for pull-out rods to maximize storage space or soft-close hinges for a seamless and quiet closing mechanism.
Selecting the Perfect Finish
To choose the perfect finish for your wardrobe hardware, consider the overall style and aesthetic you want to achieve. It’s important to select the ideal color and explore different textures to truly elevate the look of your wardrobe.
When it comes to color, think about the mood you want to create in your space. Do you want a classic and timeless feel? Then opt for finishes like brushed nickel or polished chrome. These neutral colors blend seamlessly with any color scheme and provide a sleek and sophisticated look. On the other hand, if you want to add a pop of color and personality, consider finishes like antique brass or oil-rubbed bronze. These warm and rustic hues can bring a touch of vintage charm to your wardrobe.
Texture is also a key factor to consider. By exploring different textures, you can add depth and visual interest to your wardrobe. From smooth and shiny to rough and matte, there are endless possibilities. For a modern and minimalist look, go for smooth and polished finishes. If you prefer a more rustic or industrial vibe, try textured or distressed finishes. These can give your wardrobe a unique and lived-in feel.
Preparing Your Wardrobe for the Makeover
Before diving into the makeover process, I need to assess the condition of my wardrobe and identify any areas that need attention. This includes checking for any damages, stains, or signs of wear and tear. Additionally, I should remove any old hardware, such as broken zippers or loose buttons, to ensure a clean slate for the makeover.
Assessing the Wardrobe’s Condition
After thoroughly inspecting my wardrobe, I realized the need for a makeover to revitalize my outdated attire. Here’s what I found when evaluating my wardrobe:
- Damaged Clothing: I discovered torn seams, missing buttons, and frayed hems on several garments that needed immediate attention.
- Stains and Discoloration: Some of my favorite pieces had unsightly stains and discoloration that required professional cleaning or treatment.
- Outdated Styles: Many items were simply out of fashion and needed to be replaced or updated to reflect current trends.
- Ill-fitting Clothes: I noticed that some clothes no longer fit properly, either too big or too small, making them unwearable.
Removing Old Hardware
With my wardrobe’s condition thoroughly assessed, the next step towards refreshing my old attire is removing any old hardware to prepare for the makeover. It’s important to start the cleaning process by taking off the worn-out knobs, hinges, and handles. Gently unscrewing each piece, I can already feel a sense of anticipation building up within me. As I carefully remove the hardware, I can’t help but reminisce about the memories associated with each item. Some have served me faithfully for years, while others have seen better days. But now, it’s time to let go and restore functionality to my wardrobe. Removing the old hardware is not just a practical step, it’s a symbolic one too, signaling the start of a fresh new chapter in my wardrobe’s life.
Step-By-Step Guide to Replacing Hardware
To give your old wardrobe a fresh new look, start by following this step-by-step guide to easily replace the hardware.
-
Remove the old hardware: Use a screwdriver to carefully remove the screws holding the old knobs or handles in place. Take your time to avoid any damage to the wardrobe.
-
Measure and mark: Once the old hardware is removed, measure the distance between the screw holes. Use a pencil to mark the exact spots where the new hardware will be installed.
-
Choose new hardware: Browse through a variety of knobs and handles to find the perfect ones that match your style and the overall aesthetic of your wardrobe. Consider the material, finish, and design.
-
Install the new hardware: Line up the new knobs or handles with the marked spots on the wardrobe. Insert the screws and tighten them with a screwdriver. Make sure the hardware is secure and aligned properly.
Applying a Fresh Coat of Finish
I will apply a fresh coat of finish to revitalize the appearance of my old wardrobe. Refinishing the wardrobe not only brings back its original beauty but also offers several benefits. Firstly, it helps protect the wood from damage caused by moisture, sunlight, and regular wear and tear. Additionally, refinishing allows me to customize the look of my wardrobe by choosing a new color or finish that matches my personal style and current home decor.
To achieve a smooth finish, there are a few tips I’ve learned along the way. First, I make sure to thoroughly clean and sand the surface of the wardrobe to remove any dirt, grime, or old finish. This ensures that the new coat of finish adheres properly. Next, I apply the finish in thin, even coats, allowing each coat to dry completely before applying the next. This helps to prevent drips and streaks. I also use a high-quality brush or roller to ensure a smooth and even application. Finally, I lightly sand the wardrobe between coats to remove any imperfections and create a smooth surface.


